Setup for Snowflake Native App#
This guide explains how to use Kumo SDK with Kumo Snowflake Native Application.
Running SDK Outside Snowflake#
When running the SDK outside Snowflake, you can initialize it with your Snowflake credentials. Both password-based and key-pair authentication are supported:
import kumoai as kumo

# Option 1: password-based authentication
credentials = {
    "user": "<your username>",
    "password": "<your password>",
    "account": "<your account>",
}
kumo.init(url="https://<kumo_spcs_deployment_url>/api", snowflake_credentials=credentials)

# Option 2: key-pair authentication (same key format as connector auth in the UI)
credentials = {
    "user": "<your username>",
    "private_key": "<PEM-encoded private key>",
    "account": "<your account>",
}
# Optional: for encrypted keys
# credentials["private_key_passphrase"] = "<passphrase>"
kumo.init(url="https://<kumo_spcs_deployment_url>/api", snowflake_credentials=credentials)
For detailed examples of using the SDK outside Snowflake, refer to our Introduction by Example.
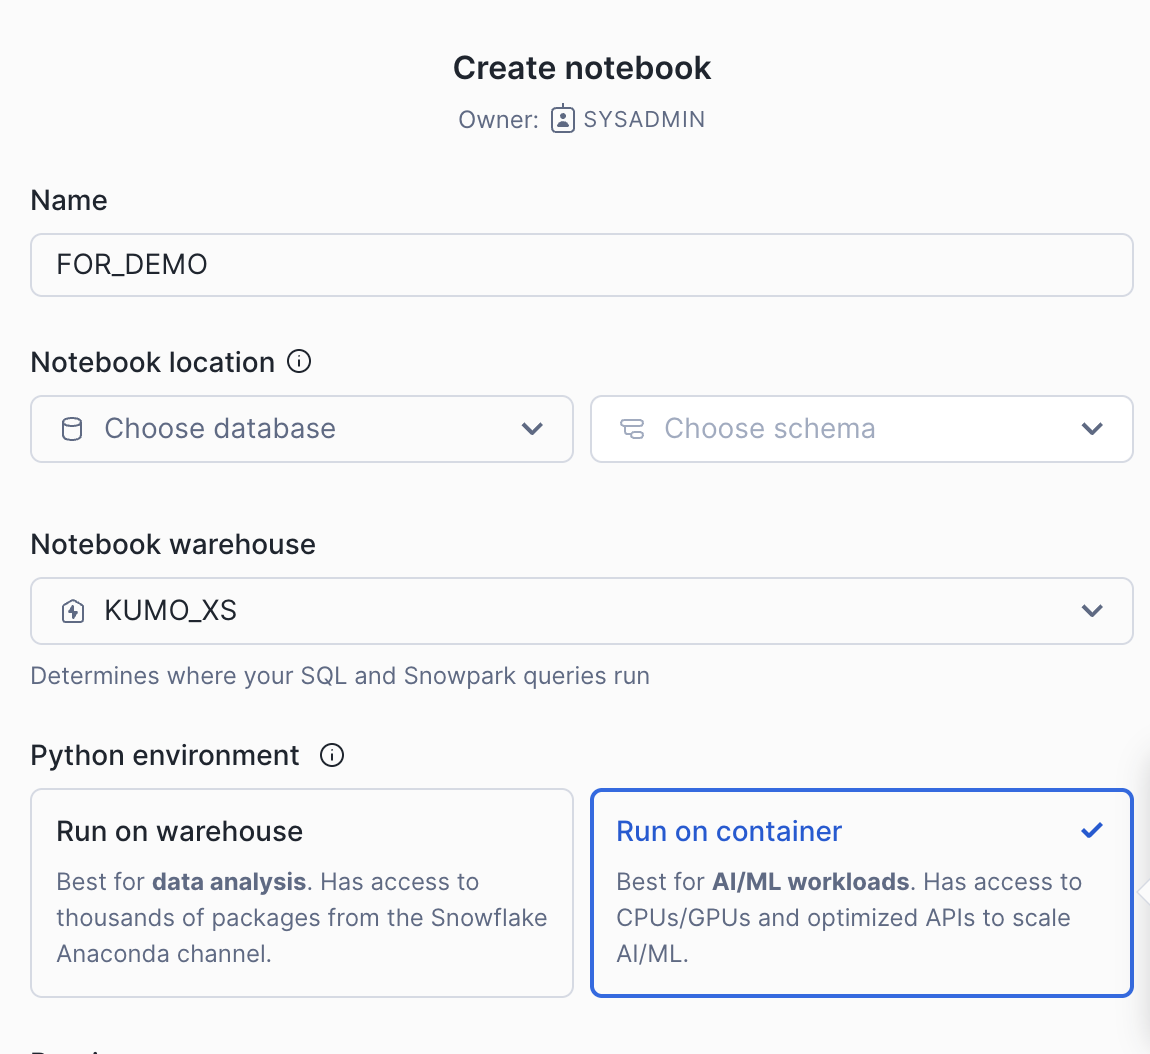
Running SDK on Snowflake#
To run the SDK directly on Snowflake, you’ll need to use a Snowflake notebook configured for Snowpark Container (choose Run on Container). This setup provides a managed environment for running machine learning workloads.
For instructions on setting up your notebook environment, refer to the Snowflake ML Notebooks on SPCS documentation.
Using External Access#
If your notebook environment has external access configured (see External Access Configuration), you can install Kumo SDK directly using pip:
pip install kumoai=<kumo_app_version>
Using Package Installation#
If external access is not available or not permitted in your environment, follow these steps:
Contact the Kumo team to obtain the SDK package zip file
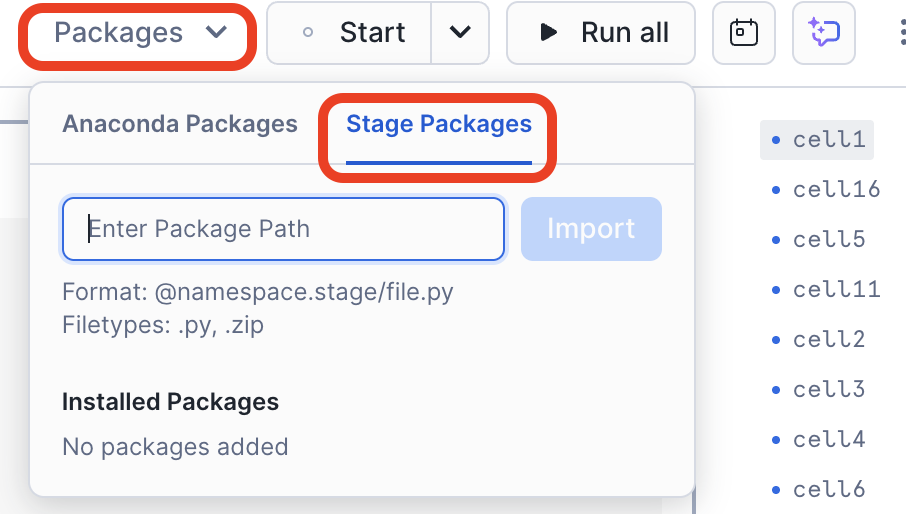
Upload the package to your Snowflake stage
Install the package from the stage
The recommended way to upload the package is using the Snowsight UI:
Sign in to Snowsight
Select Data » Add Data
On the Add Data page, select Load files into a Stage
In the Upload Your Files dialog: - Select the kumoai.zip file (maximum file size: 250 MB) - Select the database and schema where you want to create the stage - Select or create your stage (e.g., ‘kumo_stage’) - Optionally, specify a path within the stage
Select Upload
For detailed instructions, you can refer to: - Staging files using Snowsight UI - Using SnowSQL Client (command line alternative)
Getting Started#
When running in a Snowflake notebook environment, the SDK automatically uses the Snowflake context, eliminating the need for additional credentials. This is different from the normal SDK initialization process, making it simpler to get started:
import kumoai as kumo

# Initialize with just the application name - no additional credentials needed
kumo.init(snowflake_application='YOUR_APP_NAME')

# Create a Snowflake connector with your Snowflake resources
my_connector = kumo.SnowflakeConnector(
    name="YOUR_CONNECTOR_NAME",
    account="YOUR_SNOWFLAKE_ACCOUNT_NAME",
    warehouse="YOUR_SNOWFLAKE_ACCOUNT_NAME",
    database="YOUR_SNOWFLAKE_DATABASE_NAME",
    schema_name="YOUR_SNOWFLAKE_SCHEMA_NAME",
)

# Start using Kumo's features with your connector
# ...
For the rest of code block, including graph and training setup, refer to Introduction by Example.